Solar Panel Mounting Hardware: The Complete Guide (2026)
The panels get all the attention, but solar panel mounting hardware is what actually keeps your system on the roof through wind, snow, and twenty-five years of weather. This guide covers every piece of hardware in a solar mount — rails, clamps, roof attachments, pole mounts, grounding, and more — explained in plain language, with real cost numbers and answers to the questions people search most.
- What it is: Solar panel mounting hardware is the full set of parts — rails, clamps, roof attachments, and grounding equipment — that hold panels safely to a roof or the ground.
- Main parts: Roof attachments (or ground foundation), rails, clamps, grounding hardware, and wire management.
- Top brands: IronRidge, Unirac, and Quick Mount PV are the most trusted names in the U.S. market.
- Typical cost: $300–$800 for a full residential rail kit, not counting panels or the inverter.
- Warning: Mixing hardware brands, or skipping the grounding step, is one of the most common — and most expensive — installation mistakes.
Definition: Solar panel mounting hardware is the complete set of rails, clamps, roof attachments, and grounding equipment that anchors solar panels to a roof or the ground, spreading wind and snow load safely across the structure beneath them.
What Is Solar Panel Mounting Hardware?
Solar panel mounting hardware is the set of parts that hold solar panels in place on a roof or on the ground: rails, clamps, roof attachments (or a ground foundation), and grounding equipment. Without it, panels would sit loose with no way to handle wind, rain, or snow.
Think of mounting hardware like the frame of a house. Nobody notices it once the walls go up, but it’s the reason the whole structure stays standing. The same is true for solar: the panels make the power, but the hardware keeps them alive on the roof.
Solar Panel Mounting Brackets With Hardware: What’s Actually Included
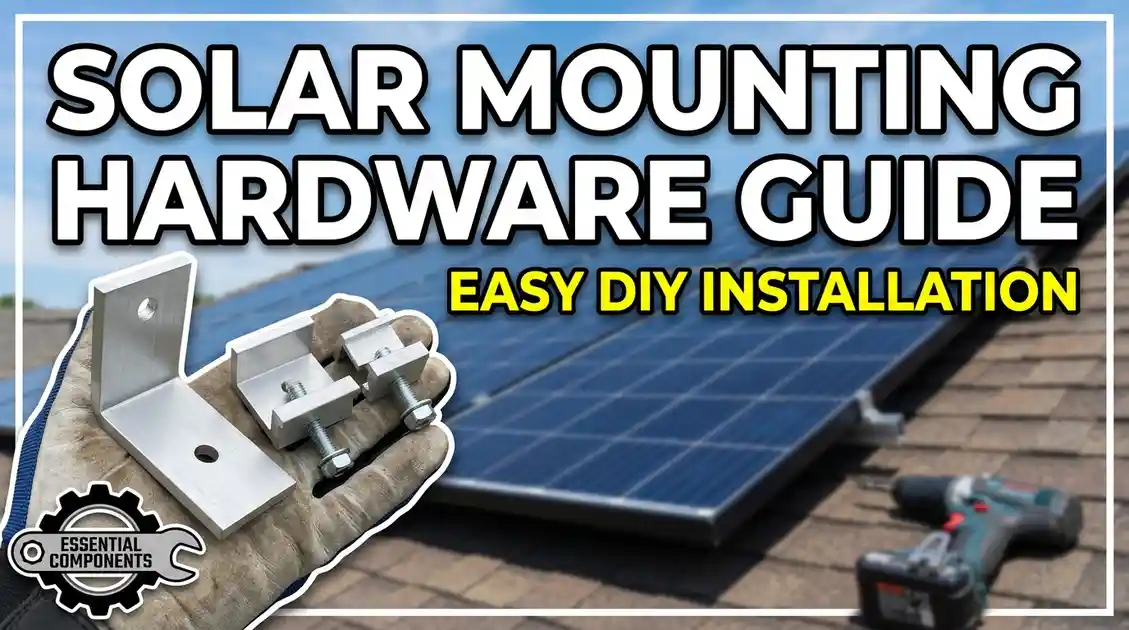
A full “solar panel mounting brackets with hardware” kit means everything needed to attach and ground the array, not just the clamps. That’s rails, roof feet or a ground foundation, mid and end clamps, a splice kit for longer rows, and grounding lugs or bonding clips.
Buying brackets alone without the matching rail, flashing, and grounding parts is the most common reason a “hardware kit” purchase turns out incomplete once the installer opens the box.
Is Solar Module Mounting the Same as Solar Panel Mounting Hardware?
Yes. “Solar module mounting” and “solar panel mounting hardware” describe the same equipment — the term “module” is simply the technical name manufacturers and electricians use for an individual solar panel. This guide uses “solar panel” throughout for consistency, but the parts are identical either way.
Rails for Solar Panels: The Foundation of Every Mount
Rails for solar panels are the long metal bars that panels attach to. They spread the weight of the panels — plus wind and snow load — evenly across the roof’s rafters or trusses. Almost every rooftop and ground-mount system uses rails in some form.
Aluminum Rails for Solar Panels
Aluminum rails are the industry standard. Aluminum is light, resists rust, and is strong enough to handle wind and snow without adding too much extra weight to the roof. Steel rails exist too, but they’re heavier and can rust unless coated well, which is why aluminum wins out in most homes and businesses.
Roof Rails for Solar Panels
Roof rails attach to the roof through mounting feet, also called flashings or standoffs. These feet are bolted into the rafters and sealed to keep water out. The rail then spans between several mounting feet, creating one long, solid base for the panels to clamp onto. Getting the spacing of these feet right is one of the most important steps in a rooftop install — poor attachment is a leading cause of mount failures in high wind.
How Many Rails Per Solar Panel?
Most homes use two rails per row of panels — one along the top edge and one along the bottom — running the full length of the row. So a row of 6 to 10 panels typically needs just 2 rails, not 2 rails for every single panel.
How Far Apart Should Rails Be for Solar Panels?
Rail spacing depends on the size of the panel and the maker’s engineering specs, but a common range is about 60% to 70% of the panel’s total length. This lines the rail up with the panel’s clamp zones, which are usually marked in the installation manual. Spacing that’s too narrow puts stress in the center of the panel. Spacing that’s too wide lets the edges flex too much in wind. Always follow the panel maker’s spec sheet instead of guessing.
Are Solar Panel Rails Universal?
Not fully. Rail systems are more standardized than they used to be, and many clips and rails share common sizes. But panel frame thickness, clamp compatibility, and load ratings still vary between brands. Mixing one company’s rails with another company’s clamps isn’t always safe or allowed by code. It’s best to use a matched rail-and-clamp system from one manufacturer, or confirm compatibility first if you plan to mix parts.
What Is a Rail in a Solar Panel System?
A rail is the metal bar that panels clamp onto. It acts as the bridge that carries the weight of the panel down to the roof or ground mounting feet. The rail isn’t part of the panel itself — it’s a separate piece of hardware installed first, with the panel attached to it afterward.
Solar Panel Roof Mounts and Flashing: Matching Hardware to Your Roof Type
Solar panel roof mounts connect the rail to your actual roof, and the right attachment depends entirely on what your roof is made of. Using the wrong one for your roof type is one of the fastest ways to cause a leak.
Composite Shingle Roofs
Need a flashed attachment — a metal or plastic flashing slides under the shingle layer above the mounting foot, so water is guided over the hole instead of through it.
Standing Seam Metal Roofs
Use a clamp-style attachment that grips the raised seam of the metal panel. This means no holes are drilled into the roof at all, which is a major advantage for leak prevention.
Tile Roofs
Need a tile hook or tile replacement mount, since standard flashing doesn’t sit flush under curved or interlocking tiles.
Flat Roofs
Often skip roof penetration altogether in favor of ballast or tilt-frame systems, covered later in this guide.
Why this matters: A roof attachment that isn’t matched to your roof type is one of the top causes of solar-related roof leaks. If you’re unsure what your roof needs, this is worth confirming with a licensed installer before drilling anything. Our full solar panel installation guide covers how this step fits into the broader install process.
Solar Panel Mounting Brackets (Clips and Clamps)
Solar panel mounting brackets — also called clips or clamps — hold each panel onto the rail. There are two main types: end clamps for the outer edge of a row, and mid clamps that hold two adjacent panels at once.
- End clamps: Used on the outer edge of a row, holding the first and last panel in place.
- Mid clamps: Used between two panels, holding both panel edges with a single clamp.
Clamps are tightened to a specific torque set by the manufacturer.
Example: over-tightening a mid clamp by even a few extra turns can crack a panel’s frame or glass at the clamp point — damage that often isn’t visible until a warranty inspection months later. Under-tightening is just as risky: a loose clamp lets the panel work itself free under sustained wind. This is one of the most common mistakes on DIY or budget installs, and it’s worth double-checking after the job is done.
Rail Splices: Connecting Rail Sections the Right Way
A rail splice joins two sections of rail together, creating one smooth, continuous surface for panels to mount on. This matters for longer rows, since rail comes in fixed lengths and needs to be joined to span a full row.
A properly installed splice keeps the rail aligned and structurally sound under wind or snow load. A poorly installed one can create a weak point, or a visible dip where the two rail sections meet. Most manufacturers sell a matched splice kit for their specific rail profile — using a generic splice, or none at all, is not recommended.
Rail-Less Mounting Systems
A rail-less mounting system skips the long rail entirely. Specially designed brackets attach straight to the roof, and panels clamp directly onto those brackets — fewer parts, faster installs, and sometimes a cleaner look.
The tradeoff is less flexibility. Rail-less systems are usually matched tightly to one panel size and one roof type, so they’re a less forgiving choice if you plan to add panels later or if your roof has an unusual layout. They’re most common with certain composite shingle installs where speed matters.
Pole Mounts for Solar Panels
A pole mount holds panels on top of, or to the side of, a vertical pole instead of a roof or the ground directly. This is common for off-grid setups, remote cabins, security cameras, and small standalone systems.
- Top-of-pole mounts: The panel array sits on top of a single pole, often with the ability to tilt for seasonal sun angle changes.
- Side-of-pole mounts: The panel is bracketed to the side of an existing pole, useful for smaller single-panel setups like a security light or gate opener.
Pole mounts need a strong, properly set foundation, since all the wind load on the panel transfers down through a single point instead of being spread across a roof structure.
Best RV Roof Solar Brackets
RV roof solar brackets need to be low-profile, vibration-resistant, and sealant-compatible, since RV roofs flex on the road in ways a house roof never does.
Example: a bracket rated fine for a stationary rooftop can work loose within a few thousand miles of highway vibration if it isn’t paired with a locking washer and a flexible sealant rated for constant movement. That’s why most RV-specific brackets use a wider base plate and a butyl-rubber seal instead of the rigid flashing used on a house roof.
- Z-brackets: The most common flush-mount option for rigid RV panels, bolted directly through the roof membrane with a sealed base.
- Adhesive-mount brackets: Used with flexible panels, skipping roof penetration entirely in favor of a strong outdoor-rated adhesive.
- Tilting brackets: Let a panel angle toward the sun when parked, then fold flat for driving — useful for boosting output at a campsite.
Shopping for the panels themselves rather than the brackets? See our full RV solar panels guide for sizing and setup.
Ballast Mounting Systems for Flat Roofs
Ballast mounting uses heavy weighted blocks to hold the racking system in place, instead of drilling into the roof. This is common on flat commercial roofs, or any site where the property owner doesn’t want holes in the roofing membrane.
The main advantage is zero roof penetration, which removes the leak risk that comes with drilled attachments. The tradeoff is weight: the roof structure needs to be able to support the added load of the ballast blocks on top of the panels themselves, which is something a structural engineer typically checks before installation.
Tilt Legs and Tilt-Frame Mounting
Tilt legs are adjustable supports that angle panels for better sun exposure, most often on flat roofs or ground-mount arrays with no natural pitch.
Some tilt-frame systems allow the angle to be adjusted a few times a year to match the sun’s seasonal position, which can meaningfully increase energy production compared to a flat, unangled panel. Tilt-frame systems also change the wind load on the array, since an angled panel catches more wind than a flat one — this is factored into the structural design, especially in high-wind regions.
Solar Panel Ground Mount Foundations
A solar panel ground mount needs a foundation that anchors the racking directly into the ground instead of a roof. Common foundation types include poured concrete piers, precast ballast blocks, and helical ground screws.
- Poured concrete piers: Deep, cured concrete footings poured below the frost line. These offer the most stable, longest-lasting anchor for permanent arrays.
- Precast concrete ballast blocks: Heavy blocks that weigh the racking down without digging, often used where ground disturbance isn’t allowed.
- Helical ground screws: Screwed directly into the ground. Faster to install than concrete, and often preferred on unstable or rocky soil.
The right choice depends on local soil conditions, frost depth, and whether the array is residential or commercial scale. Larger ground-mount projects typically get a geotechnical assessment before the foundation type is chosen.
Roof vs Ground vs Pole Mount: Which Fits Your Property?
Roof mounts are the cheapest for most homes; a solar panel ground mount costs more upfront but allows better sun angling and easier future expansion; pole mounts suit small, standalone setups.
| Mount Type | Typical Cost Impact | Roof Penetration | Best For |
|---|---|---|---|
| Roof mount | Lowest added cost — uses existing structure | Usually yes (except standing seam) | Most residential homes with usable roof space |
| Ground mount | Higher — needs a dedicated foundation | None | Ample yard space, poor roof orientation, easy future expansion |
| Pole mount | Moderate — smaller footprint than full ground mount | None | Off-grid cabins, security cameras, small standalone loads |
| Ballast (flat roof) | Moderate — no drilling, but adds structural weight | None | Flat commercial roofs where drilling isn’t allowed |
Solar Panel J-Box (Junction Box)
The j-box is the small sealed enclosure on the back of every panel, where the panel’s internal wiring connects to the external cabling running to the inverter. It houses the panel’s bypass diodes and is where MC4 connectors usually attach.
A cracked, water-damaged, or poorly sealed j-box is a common and often overlooked cause of reduced output or intermittent faults. Moisture getting into this box can slowly corrode the internal connections.
Grounding Hardware: Keeping Your Solar System Safe
Grounding hardware connects the metal parts of the mounting system — rails, frames, racking — to the earth, giving stray electrical current a safe path instead of building up in the metal structure.
- Grounding lugs: Small hardware pieces that attach a grounding wire directly to a rail or panel frame.
- Bonding clips (WEEB-style): Some rail and clamp systems include built-in grounding features, which bond panels together electrically as they’re clamped down, simplifying the wiring.
- Grounding straps: Connect the whole racking system to a grounding electrode, completing the safe path to earth.
Example: skipping a single bonding clip on one panel in a row can leave that panel’s frame electrically isolated from the rest of the array — a fault an inspector will catch with a simple continuity test, but one that’s far cheaper to get right the first time than to trace after the racking is fully installed.
Grounding requirements for solar installations follow the National Electrical Code (NEC) in the U.S. This is not a step to skip or shortcut, and most local permitting inspections check it directly before final approval.
Solar Panel Covers and Protective Covers
A solar panel cover protects panels during installation, storage, or transport — not during normal operation, since covers block sunlight and stop power production.
- During installation or storage, to protect panels from scratches, dust, or debris before they’re permanently mounted.
- During roof work or wildfire risk periods, when some installers use temporary covers to shield panels from falling debris or ash.
- For portable and RV panels, where a padded cover protects the glass during transport or storage.
Solar Panel Lift Equipment
A solar panel lift is mechanical equipment — hoists, cranes, or lifting harnesses — used to safely raise panels onto a roof without damaging the glass or frame.
For steep roofs, or larger commercial panels that can weigh over 50 pounds, a proper lift system saves time and lowers the risk of panel damage or worker injury during installation.
Can You Cut a Solar Panel in Half?
Technically yes, but it’s not recommended, and it usually voids the manufacturer’s warranty. Solar cells inside a panel are wired together in a series circuit.
Example: cutting through the glass, laminate, and internal wiring breaks that circuit, so the panel typically stops working correctly, or works at a much lower and less reliable output. If you need a smaller panel for a tight space, the better fix is buying a smaller-wattage panel built at that size from the start, rather than modifying a standard one afterward.
Automated Solar Panel Systems (Trackers)
Automated solar panel systems usually refer to solar trackers — motorized mounts that automatically adjust panel angle throughout the day to follow the sun, instead of staying fixed in one position.
- Single-axis trackers: Adjust panels east to west across the day.
- Dual-axis trackers: Also adjust for seasonal changes in the sun’s height in the sky.
Trackers can meaningfully boost energy production, often cited in the 15% to 25% range for single-axis systems, but they add mechanical complexity, ongoing maintenance, and cost compared to a fixed mount. This is why they’re more common on utility-scale and large commercial projects than on typical home rooftops.
How to Check Fastener and Rail Quality
A few quick checks can catch a hardware problem before it becomes a roof leak or a structural failure years down the line.
- Check the rail alloy. Most quality aluminum rail is marked 6063-T5 or 6061-T6 on the extrusion or spec sheet. If the alloy isn’t listed anywhere, that’s worth asking about before buying.
- Check the fastener grade. Stainless steel bolts and lag screws used outdoors should be marked A4-70 or 316 on the head. If you can’t see a marking, a magnet test helps — true stainless steel is non-magnetic.
- Check the clamp range. Measure your panel’s frame height and compare it to the clamp’s listed range in the manufacturer’s spec sheet, so you know the clamp will actually grip the frame correctly.
- Check for grounding provisions. Confirm the clamp or rail kit includes grounding lugs or bonding clips sized correctly for your rail and panel frame.
- Test continuity after grounding. Once grounding is installed, a simple multimeter check from the panel frame to the grounding conductor confirms the path is actually working, not just installed.
Best Solar Mounting Brands: IronRidge vs Unirac vs Quick Mount PV
A small group of brands consistently stand out for quality and availability in the U.S. solar module mounting market.
| Brand | Known For | Best Fit |
|---|---|---|
| IronRidge | Durable XR rail series, strong pitched-roof options | Most residential rooftop installs |
| Unirac | Flat-roof and fixed-tilt ground-mount frames | Flat roofs and ground arrays needing adjustable tilt |
| Quick Mount PV | Flashing and roof-attachment hardware, leak prevention | Composite shingle roofs where flashing quality matters most |
You generally can’t go wrong sticking with one of these three names for a residential install, and many installers mix a Quick Mount PV flashing kit with IronRidge or Unirac rails, since the two are commonly designed to work together.
Wind and Snow Load: Why Rail Thickness Matters
Rail thickness directly affects how much weight and wind pressure a rail can safely handle before flexing or failing — it isn’t just a cost difference.
Thinner rail profiles are lighter and cheaper, but they’re only rated for lower snow loads and shorter spans between mounting feet. Thicker, reinforced rail profiles can handle heavier snow accumulation and longer spans, which matters a lot in regions that get real winter snowfall. Choosing the wrong thickness for your climate is a structural risk, not just a budget decision, so this should always match your local wind and snow load requirements rather than the cheapest available option.
PV Panel Mounting Price
Mounting rail typically costs $1.50 to $4 per linear foot for standard aluminum rail, depending on the brand, the rail profile, and whether you’re buying retail or through a licensed installer’s bulk pricing.
| Item | Typical Cost |
|---|---|
| Standard aluminum rail | $1.50–$4 per linear foot |
| Full residential rail kit (rails, clamps, feet, flashing) | $300–$800 total |
| Ground-mount with concrete foundation | Higher per panel due to added structural work |
| Ground-mount with helical screws | Moderate, faster install than poured concrete |
These figures cover hardware only, separate from the panels and inverter. Ground-mount systems generally cost more per panel than roof mounts, because of the extra foundation work involved.
Frequently Asked Questions
What is solar panel mounting hardware?
How many rails per solar panel?
How far apart should rails be for solar panels?
Are solar panel rails universal?
Can you cut a solar panel in half?
How much does solar mounting hardware cost?
Choosing the Right Mounting Hardware
Mounting hardware isn’t the exciting part of a solar purchase, but it’s the part with the most consequences if it’s done wrong. A poorly clamped panel or an under-engineered rail system is far more likely to cause a costly failure than the panel itself.
Whether you’re comparing aluminum rail brands, sourcing hardware for a ground-mount array, or budgeting a full rail kit against your total install cost, matching the hardware to your roof type, wind zone, and panel spec sheet is what actually determines whether the system holds up for its full 25-plus year lifespan. If you’d rather have a professional make these calls, our directory of solar installers near you is a good place to start.
This guide is for general information. Always check your specific panel and hardware manufacturer’s installation instructions, and consult a licensed installer for anything involving roof penetration, structural changes, or electrical grounding.